
Tuckpointing vs Repointing: Key Differences & Which Your Home Needs
Tuckpointing vs. Repointing: What's the Difference and Which Does Your Home Need?
Your mason says you need repointing. Your neighbor insists the correct term is tuckpointing. The contractor down the street uses both words interchangeably. Meanwhile, your mortar joints are crumbling and you just want them fixed.
Here's the truth: tuckpointing and repointing are related but technically different processes. Understanding the distinction matters because it affects the scope, cost, and final appearance of your mortar joint repair. This guide breaks down exactly what each process involves, when you need one versus the other, and what Boston homeowners should know before hiring a mason.
What Is Repointing?
Repointing is the process of removing deteriorated mortar from the joints between bricks and replacing it with fresh mortar. It is the most common form of brick pointing work performed on residential homes.

Here's what the process looks like in practice:
Grinding out old mortar. A mason uses an angle grinder or hand chisel to remove damaged mortar to a depth of at least 3/4 inch. This creates a clean channel for the new material to bond.
Cleaning the joints. Dust, debris, and loose particles are cleared with compressed air or a brush. The joint surfaces need to be clean for proper adhesion.
Dampening the brick. The surrounding brick is lightly misted with water. Dry brick pulls moisture from fresh mortar too quickly, weakening the bond.
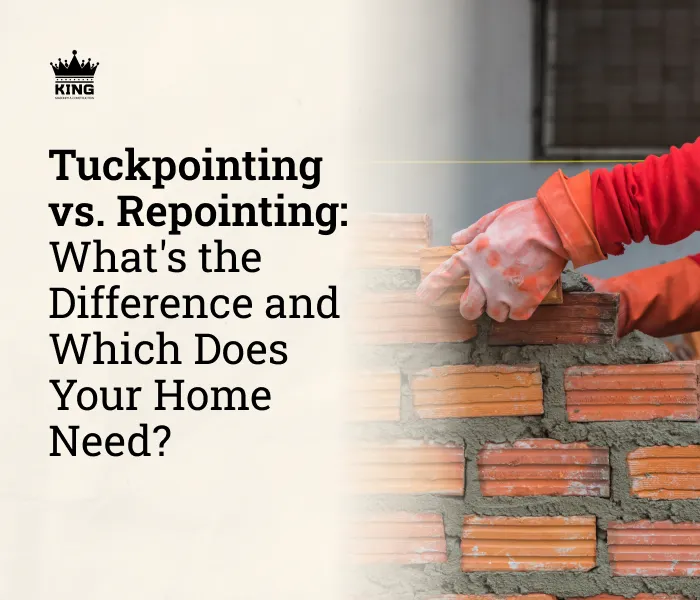
Packing fresh mortar. New mortar is pressed into the joints in layers using a pointing trowel, then tooled to match the existing joint profile (concave, flush, struck, or V-shaped).
Curing. The new mortar needs several days to cure properly. Misting it lightly during hot weather prevents premature drying and cracking.
Repointing brick is maintenance work. Mortar joints are deliberately designed to be the sacrificial component in a masonry repair. They wear out before the brick does so that the joints can be replaced affordably rather than rebuilding the entire wall. On most New England homes, mortar joints last 25 to 50 years depending on exposure, mortar type, and weather conditions.
Common signs you need repointing:
Mortar is crumbling, sandy, or falling out when you touch it
Visible gaps between bricks where mortar has eroded
Water stains on interior walls near exterior masonry
Efflorescence (white mineral deposits) appearing on brick surfaces
Mortar recedes more than 1/4 inch behind the face of the brick
The cost of repointing typically runs $8 to $25 per square foot, depending on the height of the wall, accessibility, and whether custom mortar matching is required.
What Is Tuckpointing?

Tuckpointing is a specialized decorative technique that creates the illusion of very fine, precise mortar joints. It involves two distinct colors of mortar applied to the same joint.
The process works like this:
Remove and replace the old mortar. Just like standard repointing, the deteriorated mortar is ground out and replaced with fresh mortar. This base mortar is color-matched to the surrounding brick so that it blends in visually.
Score a thin groove. While the base mortar is still slightly wet, the mason scores a narrow channel down the center of each joint.
Apply a contrasting lime putty line. A thin ribbon of contrasting mortar (usually white or off-white lime putty) is pressed into the scored groove using a specialized tool called a jointer.
The result: the base mortar disappears into the brick color, and the thin contrasting line creates the appearance of extremely narrow, perfectly uniform joints. From a few feet away, the wall looks like it was laid with surgical precision.
This technique originated in 18th-century England as a way to make rough brickwork look like the fine gauged brickwork found on expensive buildings. It became popular in Boston and other American cities during the 19th century, particularly on Federal and Victorian-era homes.
Tuckpointing costs more than standard repointing because it requires two mortar applications, precise color matching, and significantly more labor. Expect to pay $15 to $35 per square foot for true tuckpointing roughly 50% to 75% more than basic repointing.
Today, many contractors in the Boston area use the term "tuckpointing" to mean any mortar joint repair, even when they're actually performing standard repointing. This is a regional language issue, not a scam. But if you specifically want the two-color decorative technique, confirm that with your mason before signing a contract.
Tuckpointing vs. Repointing: Key Differences Explained
The question homeowners ask most often is: what is the difference between tuckpointing and repointing? Here's the clearest way to think about it.
Repointing is functional repair. Old mortar comes out, new mortar goes in. The goal is structural integrity and weather protection.
Tuckpointing is functional repair plus decorative enhancement. It includes everything repointing does, then adds the two-color technique to improve the wall's visual appearance.
Here's a side-by-side comparison:

Which does your home need?
Most homeowners need repointing. If your mortar is failing, repointing restores the structural function of the joints and protects your wall from water infiltration. That's the essential repair.
Tuckpointing makes sense in specific situations:
Historic homes where the original brickwork used the two-color technique and you want to preserve the authentic look
High-visibility facades where appearance matters as much as function
Property value considerations on homes where curb appeal directly affects resale pricing
Matching existing tuckpointing on another section of the same building
If you're unsure, ask your mason to show you examples of both finishes. A good contractor will recommend the approach that fits your building's age, style, and budget.
What Time of Year Is Best for Repointing?
Mortar needs specific temperature conditions to cure properly. This makes timing critical for any repointing or tuckpointing project.
The ideal window: late spring through early fall. Specifically, you want consistent daytime temperatures between 40 and 90 degrees Fahrenheit, with nighttime temperatures staying above 32 degrees for at least 72 hours after application.
Here's why temperature matters so much:
Below 32 degrees: Water in the mortar mix freezes before the mortar cures. Ice crystals expand inside the joint, creating weak, porous mortar that will fail within months. This is the most common reason for mortar joint repair failures in New England.
Above 90 degrees: Mortar dries too quickly. Rapid moisture loss prevents the chemical curing reaction (hydration) from completing, resulting in weak, chalky mortar that crumbles prematurely.
Ideal range (50-70 degrees): Mortar cures slowly and completely, forming the strongest possible bond with the surrounding brick.
For Boston repair, the practical repointing season runs from mid-April through mid-November. The sweet spot is May through October. Summer work is fine as long as the mason keeps the fresh mortar damp during the first 48 to 72 hours of curing.
Winter repointing is possible with cold-weather additives and protective coverings, but it adds cost and risk. Unless you have an emergency like water actively entering your home through failed joints schedule mortar work for warm weather.
One more timing consideration: book your mason early. Spring and summer are peak season for brick pointing contractors in the Boston area. Waiting until June to call often means your project gets pushed to September. Contact masons in February or March to lock in a spring start date.
Will New Mortar Stick to Old Mortar?
This is one of the most common concerns homeowners raise, and the answer is: yes, but only if the preparation is done correctly.
New mortar will not bond reliably to old mortar if you simply smear it over the surface. That's the mistake most DIY repointing attempts make. The fresh mortar peels away within a few months, leaving you back where you started.
Here's what proper preparation requires:
Remove enough old mortar. The deteriorated mortar must be ground out to a minimum depth of 3/4 inch — ideally 1 inch. This provides enough surface area for a mechanical bond between old and new material. Shallow applications (less than 1/2 inch) almost always fail.
Clean the joint thoroughly. All dust, loose particles, and debris must be removed from the joint before fresh mortar is applied. Compressed air or a strong brush does the job. Any contamination between the old and new mortar weakens the bond.
Dampen the surfaces. Both the old mortar at the back of the joint and the surrounding brick need to be damp (not soaked) before fresh mortar goes in. Dry masonry absorbs water from the new mortar too fast, preventing proper curing and adhesion.
Use compatible mortar. The new mortar must be compatible with the existing masonry. On older homes with soft, lime-based brick, using modern Portland cement mortar creates a mismatch in hardness. The hard new mortar forces stress into the softer brick, causing the brick faces to crack and spall.
Pack it in layers. For deep joints, apply mortar in lifts of about 3/8 inch, letting each layer firm up before adding the next. This prevents shrinkage cracks that form when thick mortar applications dry unevenly.
When a professional mason handles the mortar joint repair, bond failure is rare. The process is straightforward but unforgiving skip any step and the repair won't last.
Get Expert Tuckpointing and Repointing in Boston
If you’re noticing crumbling mortar joints, cracked brick lines, or gaps between bricks, it’s best to address the problem early.
Small mortar repairs today can prevent costly structural damage in the future.
Kings Masonry & Construction provides professional tuckpointing and repointing services across the Greater Boston area, carefully matching mortar color and strength to protect your brickwork.
Contact us today for a free tuckpointing and repointing estimate.
Frequently Asked Questions (FAQ)
What is the main difference between repointing and tuckpointing?
Repointing is a functional repair process that involves removing damaged mortar and replacing it with fresh mortar to restore a wall's structural integrity. Tuckpointing includes all the steps of repointing but adds a decorative finish. It uses two different colors of mortar to create the illusion of very fine, perfectly straight joints.
How do I know if my home needs repointing?
The most common signs include mortar that is crumbling or turning to sand when touched, visible gaps between bricks, or water stains appearing on interior walls near exterior masonry. If the mortar has receded more than 1/4 inch behind the face of the brick, it is time for a professional assessment.
Why does tuckpointing cost more than standard repointing?
Tuckpointing is significantly more labor-intensive. It requires a highly skilled specialist to apply a base mortar color-matched to the brick, score a precise groove, and then hand-apply a thin ribbon of contrasting lime putty. Because of the extra materials and precision required, it typically costs 50% to 75% more than basic repointing.
What is the best time of year for masonry work in Boston?
The ideal window is between mid-April and mid-November. Mortar requires temperatures between 40°F and 90°F to cure properly. In New England, winter work is risky because freezing temperatures can cause the water in the mortar to expand and crack the joint before it has even set.
Will new mortar bond properly to my old brick?
Yes, but only with proper preparation. A mason must grind out the old mortar to a depth of at least 3/4 of an inch to create a clean channel. If the new mortar is just "smeared" over the surface (a common DIY mistake), it will peel off within a few months.
Can using the wrong mortar damage my bricks?
Absolutely. This is a major concern for historic homes. If a hard, modern Portland cement mortar is used on older, softer bricks, the mortar will be stronger than the brick itself. As the building shifts or temperatures change, the hard mortar will force the stress into the brick, causing the faces of the bricks to crack or "spall."